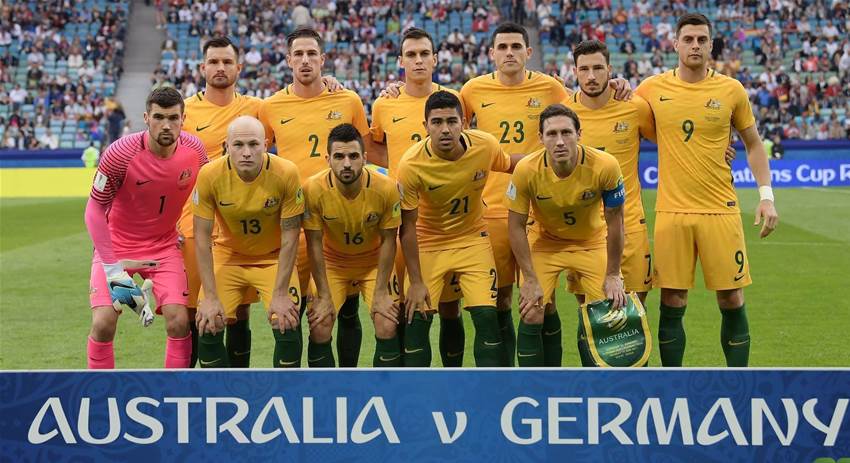
The Socceroos paid the price for a costly first-half performance, with Germany winning 3-2 and starting their Confederations Cup campaign with a win.
It was however, a game of two halves for Australia as they started slowly out of the blocks and were lucky to go in at the break 2-1 down, but aside from the opening five minutes, their second half improvement was immense.
Australia v Germany pic special
Formations

There were no surprise selections from Ange Postecoglou, whose team lined up in a similar way to the previous two fixtures. Massimo Luongo started on the right next to Mark Milligan as a holding midfielder, whilst Brighton-bound Mat Ryan regained his position in goal from Mitch Langerak.
Aziz Behich started at left wing, with midfield maestros Aaron Mooy and Tom Rogic as the two advanced central midfielders.
Joachim Loew announced a young German team prior to the tournament commencing, yet the majority of the squad still play in top-class leagues, such as the Bundesliga, Italy’s Serie A and the French Ligue 1. Arsenal’s Shkodran Mustafi was paired with Antonio Rudiger at centre-back, with Joshua Kimmich, who has been labelled ‘the modern-day Philipp Lahm’, taking his place on the right-side of defence.
Sebastian Rudy, whose break-out season with overachieving Hoffenheim has earned him a move to champions Bayern Munich, sat at the base of the German midfield, combining with Stindl and Goretzka. Captain Julian Draxler started on the left.
Australia v Germany pic special
Germany’s shape in possession

The transition between defence and attack saw Germany morph into a completely different shape, which caused havoc for the Australian defenders. The system was clearly geared toward occupying Australia’s pendulum back three and creating numerical superiority in central areas of the pitch.
The global trend among elite coaches towards an asymmetric playing system was again illustrated, with distinctly different approaches being used on each wing.
On the right-hand side, Julian Brandt would hold his wide position in order to maintain width, while Kimmich positioned himself more centrally and made underlapping runs to support chance creation.
On the left, Draxler played much more centrally than anticipated, which led to Hector providing the width. When Draxler came inside, his movement initiated a German rotation which led to Lars Stindl crossing over from the left to right, before eventually sitting in a more advanced position – usually engaging an Australian centre-back.
With this in mind, the entirety of the back three were occupied, as well as the retreating winger (in this case Mat Leckie), as Brandt and Hector engaged the defenders on the periphery of the Australian defensive line. This movement created a 3v2 situation behind the first line of pressure as shown above, which often became a 4v2 when Stindl dropped off from his high position. This strategy led to sustained possession within the Australian defensive block, which greatly aided German chance creation in the first half.
Another factor contributing to this success was the staggered positioning of the three Die Manncschaft central midfielders, with Rudy, Goretzka and Stindl all being on separate lines. This stretched the Australian defence, as if they wanted to press Goretzka or Rudy, the trade-off would be the concession of space in behind, normally for Stindl or Draxler to exploit.
Deciding not to press the two deeper players allowed for more freedom of movement, giving Rudy the space to dictate the direction of the game as well as the time to play diagonal passes to the wider players. This strategy consistently delivered midfield superiority for Germany, offering a solid platform to create goal-scoring opportunities from.
Australia v Germany pic special
Goretzka’s runs in behind
Another hallmark of the German’s general play was the penetration delivered on their right-hand side. Although there are many positives, a disadvantage of playing with a back three is that the space traditionally filled by a left or right full-back can be left vulnerable.
This proved to be the case in this match, as combinations between Stindl, Goretzka and Brandt constantly exploited the space left behind Aziz Behich. This was particularly illustrated by the third goal, where Stindl’s run from his high position distracted the left-sided Australian holding midfielder, which enabled Goretzka to exploit the space in behind Aziz Behich, who went to press Julian Brandt.

In a system with a left-midfielder or left-winger, it is likely that Brandt would have been defended by them, allowing Behich as a left-back to defend the space behind him. In saying that however, this goal could still have been prevented while employing a back three.
If a holding midfielder slotted into the back three when Behich left, the gap would have remained filled through a horizontal shift and it is likely that the opportunity would not have been created; alternatively, one of the higher midfielders could drop off and defend the winger in order to stop the through ball, but this would cause a significant deduction from Australia’s counter-attacking threat.
The strategic value of Sebastian Rudy

Rudy was employed in a very similar role to the one he played last season for Hoffenheim. As the single pivot in German possession, he was a major part of the construction of possession, as well as the prevention of Australian counter-attacks.
An excellent technician, Rudy’s positioning at the base of midfield ensured that he had consistent and abundant access to the majority of his teammates through multiple passing connections, as shown below.
Not only was he able to begin plays by needling passes between the lines, but he was also an outlet when a move needed to be restarted. Constantly moving to ensure that he was always available to the player on the ball, his deeper positioning in front of the centre-backs afforded him the space to get away from Australian defenders.
Clearly, Rudy is a player of immense ability and is of critical importance to the build-up play of the German team.
Defensively, Rudy was able to act as a third centre-back while the full-backs were making their recovery runs, buying precious time and ensuring that a quick counter could be prevented. He also acted as a sweeper behind the midfield line, picking up any second balls that fell between the lines, protecting the back four in doing so.
Australia’s improved second half performance
During the break, Postecoglou brought on Robbie Kruse for Massimo Luongo and moved Aaron Mooy to a deeper position. This proved to be a game-altering change, as the performance of the Socceroo’s greatly improved in the second half.
There were a number of factors that affected the change in performance, but the increased control of Sebastian Rudy was key. As explained above, Rudy was vital to all aspects of the German’s play in the first half, and the plan put in place at half-time to shut him down paid dividends throughout the rest of the match.
With this came a change in the way that Australia were pressing from the front, reverting to the more intense method shown against Brazil where Juric forced the ball wide for the second line of pressure to defend against the line.
In doing so, Australia were able to influence the play away from Rudy. As a contingency, the ball-far attacking midfielder man-marked the German playmaker in order to ensure that he would not have the time or space to dictate the game if he received the ball.
This defensive approach led to regular turnovers from a German team who had played so assuredly in the first half, which eventually forced a tactical change from Joachim Loew.

In order to combat the Australian press, Loew changed the German setup to allow for a double pivot, with Goretzka dropping to the right-hand side of Rudy. In doing so, an extra option was provided in build-up play, and Germany were able to play out much more effectively.
However, akin to most elements of Germany’s tactical approach, this strategy was very flexible. The double pivot commenced upon the loss of possession, and ended once the ball had been regained and build-up play had been completed. In doing so, Goretzka was once again freed to move forward.
Though this change in shape did often circumvent the Australian high press, it posed another problem for Germany. Given that they were playing with two holding midfielders and Stindl was defending against both Mooy and Milligan, Australia were had more time and space to construct possession than had previously been afforded in the first half. Aaron Mooy took the opportunity to progress play through the lines, and was able to dictate the tempo from a deeper position.
This brought with it Australia’s best sequences of possession, as the Socceroos were able to create a number of goal-scoring opportunities when combined with the effective forward movement of substitute Robbie Kruse.

Conclusion
In a competitive fixture against top opposition, Australia were made to pay for a sub-par first half performance.
Ange Postecoglou and his men will take confidence from their second half changes however, and will be hoping to carry that form into games against Cameroon and Chile. Germany will look to gain control over Group B with a positive result against La Roja, but at this stage there is still room for optimism in the Socceroos’ camp although there are not yet points.
Related Articles

Socceroos midfielder embraces move to England

Cardiff City snap up sought-after Socceroos starlet


